Tag: Connecticut golF

  • Medicine Ball Throws for Faster Clubhead Speed

    Medicine Ball Throws for Faster Clubhead Speed

    Clubhead speed is the single largest predictor of driving distance in golf. Every 1 mph increase in clubhead speed produces approximately 2.5 to 3 yards of additional carry distance. For most amateur golfers swinging between 85 and 95 mph, a 5 mph gain translates to 12 to 15 yards—the difference between hitting a 7-iron into a green versus a 6-iron, or reaching a par-5 in two versus laying up.

    The fastest way to increase clubhead speed is not more range time or swing changes. It’s rotational power training. Research published in the Journal of Strength and Conditioning Research demonstrates that golfers who incorporate medicine ball throws into their training programs improve clubhead speed by 3 to 7 mph over 8 weeks—gains that persist when training continues. The mechanism is straightforward: the golf swing is a rotational power movement, and medicine ball throws train the exact kinematic sequence (hips → thorax → arms → implement) required to generate maximum clubhead velocity.

    This article breaks down the five essential medicine ball exercises that produce measurable clubhead speed gains, with detailed execution cues, programming guidelines, and common mistakes to avoid. These are not theory. These are evidence-based drills validated in peer-reviewed research and used by tour-level strength coaches. For more on the role nutrition plays in supporting strength training adaptations, see our complete guide to nutrition essentials for golfers.

    1. Why Medicine Ball Throws Work: The Science of Rotational Power

    The golf swing operates in the transverse plane—rotation around the vertical axis of the body. Unlike sagittal-plane movements (squats, deadlifts) or frontal-plane movements (lateral raises, side lunges), transverse-plane rotation requires coordinated activation of the obliques, glutes, lats, and hip rotators to generate torque through the kinetic chain.

    Kinematic sequencing research using 3D motion capture has established that elite golfers generate clubhead speed through a proximal-to-distal sequence: the pelvis initiates rotation, followed by the thorax, then the lead arm, and finally the club. Peak angular velocities occur sequentially, with each segment reaching maximum speed slightly after the segment below it. This creates a ‘whip effect’ where energy transfers from larger, slower segments (hips) to smaller, faster segments (hands and club).

    Medicine ball throws replicate this exact sequence. A rotational medicine ball throw begins with hip rotation, transfers force through the torso, and releases through the arms—the same kinematic chain as the golf downswing. Research by Lephart et al. (2007) demonstrated that an 8-week golf-specific exercise program including medicine ball throws improved clubhead speed by an average of 5.2 mph in recreational golfers. Torres-Ronda et al. (2011) reviewed the literature and concluded that rotational strength and power are critical determinants of clubhead speed, with medicine ball training being one of the most effective modalities for developing these qualities.

    The physiological adaptation is twofold: (1) neural—improved rate of force development and motor unit recruitment in the rotational musculature, and (2) structural—hypertrophy of the obliques, glutes, and lats, which increases the force-producing capacity of the kinetic chain. Both adaptations translate directly to faster clubhead speed.

    2. The 5 Essential Medicine Ball Exercises for Clubhead Speed

    Exercise 1: Rotational Wall Throw (Bilateral Stance)

    This is the foundational drill. It teaches proper hip-initiated rotation and torso-to-arm sequencing without requiring single-leg stability, making it appropriate for beginners.

    Execution:

    • Setup: Stand perpendicular to a solid wall, feet shoulder-width apart, holding a 6-10 lb medicine ball at chest height. Position yourself 3-4 feet from the wall.
    • Wind-up: Rotate away from the wall (loading phase), shifting weight onto the back foot. Allow the hips to rotate first, followed by the torso. Keep arms relatively quiet—do not pull the ball back with the arms.
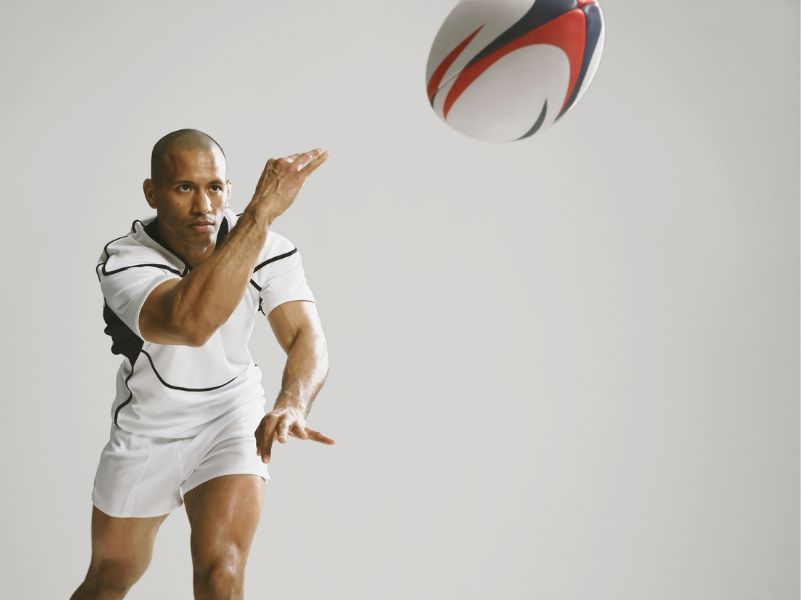
    • Throw: Explosively rotate toward the wall, initiating with the hips. As the hips rotate, the torso follows, then the arms extend to release the ball into the wall. Catch the rebound and repeat.
    • Cue: Think ‘hips → chest → arms → throw.’ The ball should leave your hands as a consequence of full-body rotation, not arm extension alone.

    Exercise 2: Rotational Side Throw (Bilateral Stance)

    Similar to the wall throw but releases the ball into open space, which allows for maximum velocity development and more closely mimics the golf release.

    Execution:

    • Setup: Stand in athletic position (slight knee bend, weight on balls of feet), holding a 6-10 lb medicine ball. Face perpendicular to your throwing direction.
    • Wind-up: Rotate away from the throwing direction, loading the back hip and allowing the torso to coil. Arms stay connected to the torso—do not separate the ball from the body during the load.
    • Throw: Explosively uncoil, driving through the hips first. Allow the torso to whip through, then release the ball at maximum velocity. Follow through fully, finishing with weight on the front foot.
    • Cue: ‘Fast hips, whip the torso, throw through the target.’ Do not decelerate the rotation after release.

    Exercise 3: Step-and-Throw (Single-Leg Finish)

    Adds a dynamic weight shift, which increases power output and more closely replicates the weight transfer in the golf swing.

    Execution:

    • Setup: Begin in a staggered stance (back foot slightly behind front foot), holding the medicine ball.
    • Step and load: Step back with the trail leg while simultaneously rotating away from the throwing direction. Weight shifts fully onto the back leg.
    • Drive and throw: Explosively drive off the back leg, stepping forward and rotating through. The step initiates the kinetic chain, followed by hip rotation, torso whip, and arm release.
    • Cue: ‘Step, drive, rotate, release.’ The step should be explosive, not passive.

    Exercise 4: Overhead Rotational Slam

    Trains the downswing pattern more specifically by starting from an elevated position and slamming the ball through the ground. Emphasizes deceleration strength and full-body integration.

    Execution:

    • Setup: Hold medicine ball overhead, arms extended, feet shoulder-width apart.
    • Wind-up: Rotate the ball overhead to the trail side (right side for right-handed golfers), loading the back hip.
    • Slam: Explosively rotate and slam the ball into the ground in front of the lead foot. The motion should mimic a golf downswing: hips fire first, torso rotates through, arms follow.
    • Cue: ‘Throw the ball through the ground.’ Maximum velocity at impact, not at the start.

    Exercise 5: Partner Rotational Toss (Reactive)

    Introduces a reactive element, where the athlete must catch and immediately redirect a thrown ball. This trains rate of force development and improves stretch-shortening cycle efficiency in the rotational musculature.

    Execution:

    • Setup: Stand perpendicular to a partner, 8-10 feet apart, in athletic stance.
    • Catch: Partner throws medicine ball to your chest. Catch it while rotating slightly in the direction of the throw (eccentric loading).
    • Throw: Immediately reverse direction and throw the ball back to your partner with maximum velocity. The transition from catch to throw should be as brief as possible—minimize ground contact time.
    • Cue: ‘Catch and explode.’ The faster the reversal, the greater the power output.

    Supporting Video Resources

    Medicine Ball Rotation Throw | Nuffield Health

    Find out how to perform a medicine ball rotation throw correctly with support from highly trained Nuffield Health Personal Trainers.

    How to Properly Execute Rotational Med Ball Throws | CrossFit Invictus

    Building explosive rotational power is an often overlooked yet highly important component of athleticism and is used in many sports as well as creates a balanced and injury-reduced athlete.

    3. Programming Guidelines: Sets, Reps, Load, and Frequency

    Rotational power training is neurally demanding. The goal is maximum velocity on every rep, which means sets and reps must be kept low to avoid fatigue-induced speed decrements.

    Training Parameters

    • Load: 6-10 lbs for most golfers. Heavier loads (12-15 lbs) can be used for strength-focused phases, but speed of movement decreases. Lighter loads (4-6 lbs) maximize velocity but reduce force output. The optimal load is one that allows maximum intent without compromising technique.
    • Sets and reps: 3-5 sets of 3-5 reps per side. Each rep should be maximum effort. Rest 2-3 minutes between sets to allow full neurological recovery. If velocity decreases across sets, end the session.
    • Frequency: 2-3 sessions per week. Space sessions at least 48 hours apart to allow recovery. Medicine ball training can be performed on the same day as lower-body strength training but should precede it (perform power work before strength work).
    • Progression: Week 1-2: Learn the patterns with lighter loads (4-6 lbs), focusing on sequencing. Week 3-4: Increase load to 8-10 lbs and emphasize velocity. Week 5-8: Maintain load and volume, continue pushing maximum velocity. Reassess clubhead speed at Week 8.

    Sample Training Week

    Monday: Rotational medicine ball throws (Exercises 1, 2, and 3), 3 sets of 4 reps per side, followed by lower-body strength training (squats, deadlifts).

    Wednesday: Reactive medicine ball work (Exercise 5), 4 sets of 3 reps per side, followed by upper-body strength training (bench press, rows).

    Friday: Overhead slams (Exercise 4) and step-and-throw (Exercise 3), 3 sets of 5 reps per side, followed by golf-specific mobility work.

    On-course practice: 2-3 sessions per week, focusing on transferring increased speed into controlled ball striking. TrackMan or similar launch monitor data is essential for validating speed gains.

    4. Common Mistakes That Limit Results

    Mistake 1: Arm-Dominant Throwing

    The most common error. Golfers with poor rotational sequencing will initiate the throw by extending the arms rather than rotating the hips. This produces a ‘push throw’ instead of a rotational throw. The ball velocity will be low, and the training effect will be minimal.

    Fix: Deliberately slow down the wind-up phase. Focus entirely on hip initiation. Think ‘hips move first, everything else follows.’ If necessary, perform the drill without releasing the ball—just rotate through and hold the finish position. Once sequencing is correct, add the throw.

    Mistake 2: Inadequate Rest Between Sets

    Power training is not conditioning. Performing medicine ball throws with short rest intervals (30-60 seconds) turns the drill into a metabolic challenge, which compromises velocity. If velocity drops across sets, the training stimulus is lost.

    Fix: Rest 2-3 minutes between sets. Use this time to reset mentally, not to perform other exercises. Track velocity using a radar gun or video analysis if possible. If velocity drops by more than 10% from set 1 to set 3, end the session.

    Mistake 3: Using Too Heavy a Load

    A 20 lb medicine ball will produce high force output, but velocity will be low. The golf swing is a high-velocity movement (clubhead speed exceeds 100 mph for many amateurs). Training needs to be velocity-specific, not just force-specific.

    Fix: Use loads that allow maximum velocity. For most golfers, 6-10 lbs is optimal. If the ball feels ‘slow’ off the hands, reduce the weight.

    Mistake 4: No Transfer Work

    Medicine ball training improves rotational power, but the improvement must transfer to the golf swing. Some golfers train explosively in the gym but swing conservatively on the range, which limits transfer.

    Fix: After medicine ball sessions, perform 10-15 swings with a speed training aid (overspeed stick, light club, or driver) at maximum intent. This creates a neuromuscular bridge between gym training and on-course performance.

    5. Measurable Performance Expectations and Validation

    Based on peer-reviewed research and practical coaching experience, golfers who consistently perform rotational medicine ball training should expect the following gains over an 8-week training block:

    MetricBaseline (Typical Amateur)8-Week Gain (Expected)
    Clubhead Speed85-95 mph+3-7 mph
    Ball Speed125-140 mph+4-10 mph
    Carry Distance220-240 yards+10-18 yards
    Rotational Med Ball Throw VelocityBaseline (measure Week 1)+15-25%

    Validation is essential. Use TrackMan, FlightScope, or another launch monitor to measure clubhead speed at baseline (Week 0), midpoint (Week 4), and endpoint (Week 8). Gains should be progressive. If clubhead speed stalls or decreases, reassess training volume, rest intervals, and technique.

    Medicine ball throw velocity can be measured using a radar gun (Stalker, Pocket Radar) pointed at the ball during release. Increases in medicine ball velocity typically precede increases in clubhead speed by 1-2 weeks, making it a useful leading indicator of training efficacy.

    The research is consistent: properly programmed rotational power training produces measurable, transferable gains in clubhead speed. Lephart et al. (2007) reported an average increase of 5.2 mph over 8 weeks. Alvarez et al. (2012) observed similar improvements in low-handicap golfers following an 18-week strength and power program that included medicine ball work. The adaptations are neural first (improved motor unit recruitment and rate coding), followed by structural (hypertrophy of rotational musculature) if training continues beyond 8-12 weeks.

    Final Word

    Medicine ball training is not a substitute for sound swing mechanics or consistent practice. But for golfers who already move well and are looking for the next marginal gain, rotational power training is the highest-ROI investment you can make. Three sessions per week, 20 minutes per session, for 8 weeks will produce measurable increases in clubhead speed—gains that translate directly to additional carry distance and lower scores.

    The five exercises outlined here—rotational wall throws, side throws, step-and-throws, overhead slams, and reactive partner tosses—cover the full spectrum of rotational power development. Start with bilateral stance drills to learn sequencing, progress to dynamic weight-shift drills to increase power output, and incorporate reactive work to maximize rate of force development.

    Track your progress. Measure clubhead speed every two weeks. Record medicine ball throw velocities. If the numbers aren’t moving, adjust the variables: load, rest, frequency, or technique. The research validates the method. Your job is to execute it consistently and measure the outcome. For Connecticut golfers with simulator access, there’s no excuse not to validate these gains in real time by incorporating these 6 proven exercises to increase golf clubhead speed.

    Sources: Lephart SM, Smoliga JM, Myers JB, Sell TC, Tsai YS. An eight-week golf-specific exercise program improves physical characteristics, swing mechanics, and golf performance in recreational golfers. Journal of Strength and Conditioning Research. 21:860–869, 2007. | Torres-Ronda L, Sanchez-Medina L, Gonzalez-Badillo JJ. Muscle strength and golf performance: a critical review. Journal of Sports Science and Medicine. 10:9–18, 2011. | Alvarez M, Sedano S, Cuadrado G, Redondo JC. Effects of an 18-week strength training program on low-handicap golfers’ performance. Journal of Strength and Conditioning Research. 26:1110–1121, 2012.


  • Jump Squats to Increase Driver Distance

    Jump Squats to Increase Driver Distance

    The golf swing begins from the ground up. Before the hands move, before the club accelerates, before the ball is struck, force is generated through the feet, transmitted through the legs and hips, and transferred up the kinetic chain to the clubhead. Biomechanical research using force plates has established that elite golfers produce ground reaction forces exceeding 1.5 times body weight during the downswing. This force originates primarily from the lower body—the glutes, quadriceps, hamstrings, and calves—and serves as the foundation for all clubhead speed.

    Jump squats train exactly this capacity: the ability to generate maximum vertical force in minimal time. Research by Keogh et al. (2009) demonstrated significant correlations between lower-body power metrics (vertical jump height, peak power output) and clubhead speed in golfers across all handicap levels. The stronger the correlation between vertical jump and swing speed, the more obvious the intervention: train lower-body explosiveness, and clubhead speed will follow.

    This article outlines a complete 12-week jump squat progression designed to increase driver distance through improved ground reaction force production. It includes the physiological rationale, detailed execution cues, load recommendations, programming guidelines, and realistic performance expectations. Combined with rotational power work like medicine ball throws, jump squats form the foundation of an evidence-based speed training program.

    1. Ground Reaction Force: Why Lower-Body Power Determines Clubhead Speed

    Ground reaction force (GRF) is the force the ground exerts on the body in response to the body pushing into the ground. During the golf downswing, the lead leg drives into the ground, creating a vertical GRF that stabilizes the pelvis and allows the hips to rotate explosively. The greater the GRF, the more stable the base, and the more efficiently rotational force can be transferred up the kinetic chain.

    Force plate studies of professional golfers reveal peak vertical GRFs of 1.2 to 1.8 times body weight on the lead leg during the downswing. This occurs in approximately 0.15 to 0.20 seconds—an explosive, ballistic movement. Amateur golfers with slower swing speeds produce lower peak GRFs (0.8 to 1.2 times body weight) and take longer to reach peak force. The difference is rate of force development (RFD)—how quickly force can be generated. Jump squats train RFD directly.

    Keogh et al. (2009) measured vertical jump height, peak power output, and clubhead speed in golfers ranging from low handicap to high handicap. The correlation between vertical jump height and clubhead speed was r = 0.62 (p < 0.01), indicating that approximately 38% of clubhead speed variance could be explained by lower-body power. Golfers with higher vertical jumps consistently produced faster clubhead speeds, independent of age, body weight, or swing mechanics.

    The mechanism is straightforward: generating force against the ground requires strong, explosive leg musculature. Jump squats develop concentric power (the ability to accelerate a load rapidly), eccentric strength (the ability to absorb and redirect force), and stretch-shortening cycle efficiency (the ability to transition from eccentric to concentric contraction in minimal time). All three qualities are essential for maximizing GRF during the golf swing.

    Importantly, jump squats are not just about strength. A golfer who can squat 400 lbs but cannot jump explosively will produce lower GRF than a golfer who squats 250 lbs but jumps with high velocity. The training stimulus must be explosive to produce explosive adaptations. This is why jump squats, not traditional squats alone, are the key intervention for improving lower-body contribution to clubhead speed.

    2. The 5 Key Components of Jump Squat Execution

    Component 1: Setup and Bar Position

    Bar placement: High bar position (across the upper traps), not low bar. High bar position allows for a more vertical torso, which is safer during explosive movements and better mimics the upright posture of the golf swing.

    Grip: Hands slightly wider than shoulder width, elbows pointing down. Grip tight enough to control the bar but not so tight that the upper body becomes rigid.

    Stance: Feet shoulder-width apart, toes slightly turned out (5-10 degrees). Weight on the midfoot to heel, not the toes.

    Component 2: The Descent (Eccentric Phase)

    Depth: Descend to parallel or slightly below parallel (hip crease at or below knee). Going too deep (ass-to-grass) increases time to reverse direction and reduces power output. Going too shallow reduces the stretch-shortening cycle benefit.

    Speed: Descend under control, but do not ‘brake’ at the bottom. The descent should be deliberate, not slow. Aim for approximately 0.6 to 0.8 seconds from start to bottom.

    Cue: ‘Sit back and down, load the hips.’ Keep the chest up, torso relatively vertical.

    Component 3: The Reversal (Stretch-Shortening Cycle)

    This is the most critical phase. At the bottom of the squat, the quadriceps, glutes, and hamstrings are eccentrically loaded (stretched under tension). The reversal—the transition from eccentric to concentric—must be as brief as possible to maximize elastic energy storage and recoil.

    Cue: ‘Touch and explode.’ Do not pause at the bottom. The moment you reach depth, reverse direction with maximum intent. Think of the bottom position as a loaded spring—compress it and let it release.

    Component 4: The Jump (Concentric Phase)

    Drive: Explosively extend the hips, knees, and ankles simultaneously. Push through the entire foot—heel, midfoot, and finally the toes as you leave the ground.

    Intent: Maximum velocity. Every rep should be a maximal-effort jump. The bar should leave your shoulders at the peak of the jump. You should achieve full triple extension (hips, knees, ankles fully extended) before leaving the ground.

    Cue: ‘Jump as high as possible, as fast as possible.’ Do not hold back. Power is force multiplied by velocity—velocity is the priority.

    Component 5: The Landing (Eccentric Loading)

    Absorption: Land on the midfoot with knees slightly bent. Absorb the landing force by flexing the hips, knees, and ankles. Do not land stiff-legged—this increases injury risk and reduces training quality.

    Reset: After landing, reset your position before the next rep. Stand fully upright, re-brace the core, and initiate the next descent. Do not perform continuous reps (jumping immediately after landing). Each rep should be discrete with a brief reset.

    Cue: ‘Land soft, reset, repeat.’ The landing is part of the training stimulus—eccentric strength develops during the absorption phase.

    Supporting Video Resources

    How to Properly Perform Jump Squat

    Jump squats are a bodyweight only exercise that helps to build lower body strength, improve your cardiovascular fitness, burn calories, and improve your balance.

    How to Use Your Legs in The Golf Swing for Power

    Swing feeling weak and arms? Sore back or knee after playing golf? Try this simple exercise and improve your game INSTANTLY!

    3. Load Guidelines: Finding Your Optimal Jump Squat Weight

    The optimal load for jump squats is the load that maximizes power output—not the load that maximizes force or velocity in isolation, but the load where force multiplied by velocity is highest. This is typically 20% to 40% of one-rep max (1RM) back squat for most athletes.

    For golfers who do not know their 1RM, a simpler guideline is to use 25% to 35% of body weight as the external load (bar plus plates). For example:

    • 70 kg golfer: 17.5 to 24.5 kg (approximately 40 to 55 lbs total, including the bar)
    • 80 kg golfer: 20 to 28 kg (approximately 45 to 60 lbs total)
    • 90 kg golfer: 22.5 to 31.5 kg (approximately 50 to 70 lbs total)

    The load should be light enough that you can jump explosively and achieve visible air time (both feet leaving the ground by several inches). If the load is too heavy, ground contact time increases, velocity decreases, and the movement becomes more of a ‘hop’ than a true jump. If the load is too light, force production is insufficient to create a meaningful training stimulus.

    To find your optimal load:

    Load Testing Protocol

    • Week 1: Perform 3 reps with just the bar (20 kg / 45 lbs). Assess jump height and velocity. This is your baseline.
    • Week 2: Add 10 kg (22 lbs) to the bar. Perform 3 reps. If jump height decreases by less than 10%, the load is appropriate. If jump height decreases by more than 20%, the load is too heavy.
    • Week 3: Add another 5-10 kg if jump height was maintained. Test again. Continue this process until you identify the load where jump height begins to decrease significantly (>15% drop from baseline). Your optimal training load is 5-10 kg lighter than that point.

    Alternatively, use a jump mat or Vertec to measure jump height at different loads. The load that produces the highest jump height multiplied by total system mass (body weight plus bar weight) is your optimal power load.

    For most recreational golfers, optimal jump squat loads fall in the range of 40 to 70 lbs total (bar plus plates). Professional or collegiate athletes with extensive strength training backgrounds may use 60 to 100 lbs. Loads above 50% of 1RM are generally too heavy and shift the stimulus from power development to strength development, which is not the goal of jump squat training for golf.

    4. The 12-Week Jump Squat Progression for Driver Distance

    This progression is designed for golfers with at least 6 months of consistent strength training experience. If you are new to resistance training, spend 8-12 weeks building foundational strength with traditional squats, lunges, and deadlifts before introducing jump squats.

    PhaseVolume (Sets x Reps)Load & Focus
    1. Technique3 x 3 per session, 2x/weekBar only (45 lbs). Focus: depth, reversal, landing
    2. Load Acclimation4 x 3 per session, 2x/week25% BW. Focus: maintain velocity with added load
    3. Power Development5 x 3 per session, 2-3x/week30% BW. Focus: maximum intent every rep
    4. Peak Power6 x 3 per session, 2x/week35% BW. Focus: peak velocity and jump height
    5. Taper & Test3 x 3 per session, 1x/weekReduce volume. Test clubhead speed Week 12

    Key programming notes:

    • Rest intervals: 2-3 minutes between sets. Power training is neurally demanding. Inadequate rest reduces velocity and compromises the training stimulus.
    • Weekly frequency: 2-3 sessions per week, spaced at least 48 hours apart. Jump squats can be performed on the same day as upper-body strength training but should be the first exercise of the session (perform power work before strength work).
    • Intra-session sequencing: Perform jump squats after a thorough warm-up but before any other lower-body work. If combining with medicine ball throws or other rotational power training, perform jump squats first (lower body before upper body).
    • Deload weeks: Week 6 and Week 11 are partial deloads. Reduce volume by 30-40% (e.g., 3 sets instead of 5) but maintain intensity and intent.
    • Progression triggers: Increase load only if jump height and velocity are maintained. If performance declines across consecutive sessions, hold the load constant or reduce slightly.

    5. Realistic Performance Gains: What to Expect from 12 Weeks of Jump Squats

    Jump squats alone will not add 15 mph to your clubhead speed. But combined with rotational power training (medicine ball throws) and consistent practice to integrate the increased power into your swing mechanics, jump squats can produce measurable, lasting improvements in driver distance.

    Based on published research and practical coaching outcomes, recreational golfers who complete a 12-week jump squat program while maintaining their existing swing practice should expect:

    Performance MetricBaseline (Typical)12-Week Gain
    Vertical Jump Height16-22 inches+2-4 inches
    Peak Power Output (Watts)2,000-3,000 W+200-400 W
    Clubhead Speed85-95 mph+4-6 mph
    Ball Speed125-140 mph+6-9 mph
    Carry Distance220-240 yards+12-18 yards

    Important caveats:

    • Transfer work is essential. Jump squats improve your capacity to produce force. That capacity must be integrated into the golf swing through deliberate speed training (overspeed drills, lighter clubs, maximum-intent swings). Without transfer work, gains in lower-body power may not fully translate to clubhead speed.
    • Nutrition supports adaptation. Lower-body power training requires adequate protein (1.6-2.2 g/kg body weight daily) and sufficient caloric intake to support muscle growth and recovery. For more on fueling strength adaptations, see our guide to nutrition essentials for golfers.
    • Individual variation is high. Golfers with poor existing lower-body strength will see larger absolute gains. Golfers who already have strong legs but poor rotational mechanics may see smaller gains from jump squats alone and benefit more from medicine ball training.
    • Testing validates progress. Measure vertical jump height (using a Vertec, jump mat, or smartphone app) at Week 0, Week 6, and Week 12. Measure clubhead speed on TrackMan or similar launch monitor at the same intervals. If vertical jump improves but clubhead speed does not, the issue is transfer—integrate more speed-specific swing work.

    Research by Sell et al. (2007) demonstrated that highly proficient golfers exhibit significantly greater lower-body strength and power compared with less skilled golfers. The implication is clear: improving lower-body explosiveness is not just correlated with better golf performance—it is a causal factor. Jump squats, properly programmed and executed with intent, are one of the most time-efficient methods available for developing this quality.

    Final Word

    Jump squats are not glamorous. They require a barbell, a rack, and a commitment to lifting explosively 2-3 times per week for 12 weeks. They will not fix a swing path issue or improve your putting. But for golfers who want to hit the ball farther—who are tired of being outdriven by playing partners with worse swings—jump squats are one of the highest-return investments you can make.

    The mechanism is validated: ground reaction force originates from lower-body power, and lower-body power can be trained. Vertical jump height correlates with clubhead speed at r = 0.62. A 12-week jump squat protocol produces measurable improvements in both. The research is not ambiguous. The programming is not complicated. The results are not theoretical.

    Start with the bar. Learn the movement. Add load progressively. Train with intent. Measure the outcome. For Connecticut golfers with access to strength training facilities and launch monitors, there is no logistical barrier. The question is whether you’re willing to do the work. If you are, 12-18 yards of additional carry distance is the reward, especially once you understand what actually determines shot distance during your practice sessions.

    Sources: Keogh JW, Marnewick MC, Maulder PS, Nortje JP, Hume PA, Bradshaw EJ. Are anthropometric, flexibility, muscular strength, and endurance variables related to clubhead velocity in low- and high-handicap golfers? Journal of Strength and Conditioning Research. 23(6):1841–1850, 2009. | Sell TC, Tsai YS, Smoliga JM, Myers JB, Lephart SM. Strength, flexibility, and balance characteristics of highly proficient golfers. Journal of Strength and Conditioning Research. 21:1166–1171, 2007.

  • 5 Nutrition Essentials Every Golfer Needs

    5 Nutrition Essentials Every Golfer Needs

    Golf doesn’t look like an endurance sport. You’re not running marathons or swimming laps. Most of the round is spent walking, waiting, and executing a swing that lasts less than two seconds. But appearances deceive. A competitive 18-hole round takes 4 to 6 hours, covers up to 10 kilometers, and includes hundreds of explosive movements. Blood glucose drops by 10 to 30 percent without nutrition. Dehydration above 1 percent of body weight impairs both distance and accuracy. And yet, most golfers show up to the course with a sleeve of crackers and a bottle of water, wondering why they fade on the back nine.

    Two comprehensive research reviews—one published in Sports Medicine (2024) and another in Nutrients (2023)—have systematically analyzed the available evidence on nutrition and golf performance. Together, these papers reviewed 82 studies from 16 countries, including energy expenditure data, hydration protocols, supplement trials, and macronutrient strategies. The conclusion is unambiguous: nutrition matters for golf. Not as much as swing mechanics or course management, but enough that ignoring it leaves performance on the table.

    This article distills those reviews into five practical, evidence-based nutrition essentials that every golfer—from weekend amateur to touring professional—should know and implement. These are not theoretical guidelines. These are actionable strategies supported by peer-reviewed research and validated in competitive settings.

    Essential #1: Carbohydrate Feeding During the Round Prevents Performance Decline

    Blood glucose is the brain’s primary fuel source. During a round of golf, blood glucose concentrations decline steadily—by as much as 10 to 30 percent in players who consume no nutrition. This decline correlates with increased perceived fatigue, impaired decision-making, and worse shot execution, particularly in the final holes when tournaments are decided.

    A study by Nagashima et al. (2023) provided 12 competitive amateur golfers with 30 grams of carbohydrate per hour during an 18-hole round, delivered via gummies. Interstitial glucose concentrations—measured continuously via sensor—were significantly higher in the carbohydrate group at holes 4–6, 7–9, 10–12, 13–15, and 16–18 compared with a control group receiving no nutrition. Anticipated fatigue was significantly reduced in the carbohydrate-fed group. The benefit was dose-dependent and time-sensitive: feeding throughout the round, not just at the start, maintained glucose stability.

    Thompsett et al. (2022) compared three conditions in six amateur golfers over 9 holes: zero-calorie drink, carbohydrate alone, and carbohydrate plus protein. Both carbohydrate conditions reduced perceived fatigue compared with the zero-calorie placebo, but no differences were observed between carbohydrate alone and carbohydrate with protein. This suggests that the primary driver of the benefit is carbohydrate availability, not protein co-ingestion.

    Practical Application

    • Target: 30 grams of carbohydrate per hour during competitive rounds or practice sessions exceeding 3 hours.
    • Sources: Energy gels, gummies, sports drinks, bananas, or granola bars. Choose portable, shelf-stable options that don’t require refrigeration.
    • Timing: Start feeding at hole 3 or 4. Continue every 3 holes (approximately every 45–60 minutes). Do not wait until you feel fatigued—prevention is more effective than correction.
    • Glycemic index: Robinson (2018) found no performance difference between low-GI and high-GI carbohydrates when consumed pre- and during-round. Convenience and tolerance should guide selection, not GI.

    Essential #2: Dehydration of Just 1% Body Weight Impairs Golf Performance

    Hydration status affects both cognitive and physical performance in golf. Smith et al. (2012) demonstrated that mild dehydration—approximately 1.1 kg body weight loss, or roughly 1.5 percent dehydration—significantly impaired distance and accuracy in seven amateur golfers. Dehydrated players hit their 9-iron an average of 114.6 meters compared with 128.6 meters when euhydrated. Accuracy also declined: shots finished 7.9 meters offline when dehydrated versus 4.1 meters when properly hydrated.

    Magee et al. (2017) tracked hydration status in 15 elite collegiate golfers immediately before and after an 18-hole round. Golfers who started the round dehydrated (urine specific gravity > 1.020) averaged 79.5 strokes compared with 75.7 strokes in euhydrated players—a difference of nearly four strokes. Critically, all dehydrated players failed to consume sufficient fluids during the round to return to a euhydrated state, indicating a knowledge gap that can be immediately corrected through education.

    Sweat rates during golf are typically low—0.17 to 0.22 liters per hour in temperate climates—but can exceed 0.4 liters per hour in hot, humid conditions. Golfers should not rely on thirst as a hydration cue; by the time thirst is perceived, mild dehydration has already occurred.

    Practical Application

    • Baseline hydration: Begin every round euhydrated. Check urine color: pale yellow indicates adequate hydration; dark yellow or amber indicates dehydration. Urine specific gravity below 1.020 is the research-validated threshold.
    • During-round hydration: Consume 150–250 mL of fluid every 3 holes (approximately every 45 minutes). In hot conditions (above 85°F / 29°C), increase to 200–300 mL every 3 holes.
    • Beverage composition: Plain water is sufficient in temperate conditions. In hot conditions or rounds exceeding 4 hours, use a beverage containing electrolytes (sodium and potassium) and carbohydrates (6–8% solution) to replace losses and maintain energy.
    • Post-round rehydration: Drink 150% of fluid lost during the round (e.g., if you lost 1 kg body weight, consume 1.5 liters of fluid over the next 2–3 hours).

    Essential #3: Energy Expenditure Is Lower Than You Think—But Still Matters

    One of the most surprising findings from the Sports Medicine review is how variable—and often inflated—energy expenditure estimates are for golf. Early studies using heart rate monitors reported values as high as 11.8 kcal/min, which would place golf in the same energy expenditure range as running a marathon. This is implausible for a sport whose primary activity is walking.

    Kasper et al. (2023) used ActiHeart monitors—validated against doubly labeled water—to measure activity energy expenditure in 16 elite golfers (handicap under 5) across three conditions: carrying the bag, using a manual trolley, or using an electric trolley. The results were considerably lower than earlier estimates:

    Transport MethodEnergy Expenditure (kcal/round)Energy Expenditure (kcal/min)
    Bag carrying688 ± 2133.4
    Manual trolley756 ± 2103.6
    Electric trolley663 ± 2183.2

    For context, 3.4 kcal/min is approximately 4.8 METs—moderate-intensity activity, comparable to brisk walking. This means a typical 18-hole round expends roughly 660–760 kcal above resting metabolic rate, not the 1,500–2,000 kcal suggested by older studies. Professional golfers using caddies likely expend even less, as they are not transporting clubs and often walk more direct routes.

    Practical Application

    • Daily energy needs: Base daily caloric intake on resting metabolic rate plus activity. For a 75 kg golfer with moderate off-course training, total daily energy expenditure is approximately 2,400–2,800 kcal, not 3,500+. Overfeeding leads to unwanted fat gain; underfeeding impairs recovery and adaptation.
    • Carbohydrate periodization: Match carbohydrate intake to training demands. On competition days or heavy practice days, consume 3–5 g/kg body weight. On rest days, reduce to 2–3 g/kg. This prevents chronic carbohydrate surplus while maintaining performance.
    • Protein for strength gains: If incorporating resistance training (which improves clubhead speed and driving distance), consume 1.6–2.2 g protein per kg body weight daily, distributed across 4–5 meals. This supports muscle protein synthesis and recovery.

    Essential #4: Caffeine and Creatine Both Improve Golf Performance

    The supplement literature in golf is limited, but two ergogenic aids—caffeine and creatine monohydrate—have demonstrated measurable benefits in peer-reviewed, placebo-controlled trials.

    Caffeine

    Mumford et al. (2016) examined caffeine supplementation during a 36-hole competitive tournament in 12 male golfers (handicap 3–10). Participants consumed approximately 1.9 mg/kg caffeine 25–35 minutes before the round, then a second dose after 9 holes (total dose: 3.8 mg/kg per round). Caffeine improved total score (76.9 strokes versus 79.4 strokes in placebo), greens in regulation (8.7 versus 6.9), and driving distance (239.9 meters versus 233.3 meters). Self-reported energy levels were higher throughout the round, and perceived fatigue was lower.

    Stevenson et al. (2009) tested a carbohydrate-caffeine sports drink (1.6 mg/kg caffeine with 0.64 g/kg carbohydrate) in 20 amateur golfers during a simulated 18-hole round. The caffeine-carbohydrate drink improved putting performance, increased alertness, and reduced the number of putts falling short of the hole. The study could not isolate caffeine’s effect from carbohydrate, but the combined intervention was effective.

    Creatine Monohydrate

    Ziegenfuss et al. (2015) investigated a multi-ingredient supplement containing 5 grams of creatine monohydrate, 50 mg coffee extract, calcium fructoborate, and vitamin D in male golfers with handicaps between 5 and 15. After 30 days of supplementation combined with strength training, driving distance increased from 270 yards to 284 yards—a gain of 14 yards. Peak power and velocity during bench press throws also improved. While the supplement was multi-ingredient, the low caffeine dose (50 mg) suggests creatine was the primary driver of the observed benefit.

    Practical Application

    • Caffeine protocol: Consume 3–5 mg/kg body weight 30–60 minutes before the round. For a 75 kg golfer, this is 225–375 mg caffeine—roughly equivalent to 2–3 cups of coffee or 1–2 caffeine tablets. Consider a second dose at the turn (9 holes) if playing 18 or more holes.
    • Caffeine cautions: Do not consume caffeine after 2 PM if playing afternoon rounds, as this may impair sleep quality—a known dementia risk factor and performance inhibitor. Caffeine-naïve players should trial caffeine during practice rounds before using it in competition.
    • Creatine loading: Consume 5 grams of creatine monohydrate daily for at least 4 weeks to saturate muscle creatine stores. Creatine supports strength training adaptations and may enhance cognitive performance under fatigue. Take with a carbohydrate-containing meal to enhance uptake.

    Third-party testing: Use only supplements batch-tested by organizations like NSF Certified for Sport or Informed Sport to minimize contamination risk, particularly for competitive golfers subject to anti-doping rules.

    Supporting Video Resources

    Does Carb Timing Affect Performance?

    Fueling timing isn’t just about how much you eat, but when you take it. This discussion breaks down what the research shows when total carbs are matched, comparing steady intake with front-loading and back-loading.

    The Science of Caffeine in Sports Performance

    Learn how caffeine enhance mental and physical health and performance, including the optimal dosages and intake schedules for caffeine.

    Essential #5: Travel Nutrition and Illness Prevention Matter for Elite Golfers

    Professional golfers competing on the PGA Tour, DP World Tour, or LIV Tour face travel demands that rival those of any endurance athlete. A typical season includes 30–45 tournaments across 18–24 countries and five continents. Travel fatigue, jet lag, gastrointestinal distress, and upper respiratory tract infections (URTIs) are occupational hazards that directly impair performance.

    The Nutrients review by Berlin et al. (2023) notes that despite extensive travel schedules, no golf-specific studies have examined nutritional strategies to mitigate travel-related performance decrements. However, research from other sports provides actionable guidance that golfers can adopt.

    Vitamin D and Immune Function

    Monlezun et al. (2015) analyzed data from 14,108 participants and found that individuals with vitamin D levels below 30 ng/mL had a 58% higher risk of acute respiratory infections. Golfers competing in northern latitudes or spending significant time indoors (practice facilities, hotels, airports) are at risk for vitamin D deficiency. Maintaining levels above 30 ng/mL through supplementation (1,000–2,000 IU daily) or sunlight exposure may reduce URTI incidence during the season.

    Probiotics and Gastrointestinal Health

    Although no golf-specific trials exist, evidence from endurance sports suggests that probiotic supplementation (particularly Lactobacillus and Bifidobacterium strains) reduces the incidence and duration of URTIs and GI distress, especially during periods of high training load or travel. A daily probiotic containing at least 10 billion CFU may be a low-risk, potentially high-reward intervention for traveling golfers.

    Jet Lag and Circadian Rhythm Management

    Circadian desynchronization impairs cognitive performance, mood, and decision-making—all critical for golf. Nutritional strategies to manage jet lag include: (1) adjusting meal timing to the destination time zone 24–48 hours before departure, (2) strategic caffeine use to promote wakefulness during destination daylight hours, and (3) avoiding large meals and alcohol during flights, which exacerbate dehydration and disrupt sleep.

    Practical Application

    • Vitamin D baseline: Test serum 25(OH)D annually. Supplement to maintain levels above 30 ng/mL (75 nmol/L). Dosage depends on baseline and geography; 1,000–2,000 IU daily is typical for maintenance.
    • Probiotics: Consider a multi-strain probiotic during the competitive season, particularly when traveling internationally. Start supplementation 2 weeks before departure to allow colonization.
    • Pre-travel preparation: Familiarize yourself with food availability at the destination. Identify grocery stores, restaurants serving familiar foods, and hotel kitchen facilities. Bring shelf-stable protein sources (protein powder, bars) and portable carbohydrate options if local availability is uncertain.
    • Hydration during flights: Drink 250 mL of water per hour during flights. Avoid alcohol and caffeine during long-haul flights, as both exacerbate dehydration and disrupt sleep quality.
    • Meal timing for jet lag: Shift meal times toward the destination schedule 1–2 days before departure. Upon arrival, eat meals at local mealtimes, even if not hungry. This accelerates circadian re-entrainment.

    Quick Reference: The Five Essentials Summarized

    EssentialKey FindingAction Item
    1. Carbohydrate Feeding30 g/hour prevents 10–30% blood glucose declineFeed every 3 holes starting at hole 3; use gummies, gels, or sports drinks
    2. Hydration1% dehydration reduces distance and accuracyDrink 150–250 mL every 3 holes; start euhydrated (USG < 1.020)
    3. Energy Expenditure~3.4 kcal/min; 660–760 kcal per roundMatch daily intake to training demands; avoid chronic surplus or deficit
    4. SupplementsCaffeine (3–5 mg/kg) and creatine (5 g/day) both improve performanceCaffeine 30–60 min pre-round; creatine daily for 4+ weeks
    5. Travel NutritionVitamin D > 30 ng/mL reduces URTI risk by 58%Supplement vitamin D; consider probiotics; manage jet lag via meal timing

    Final Word

    Nutrition will never replace good swing mechanics, course management, or mental resilience. But for golfers who already have those fundamentals in place, nutrition is the variable that separates consistent performance from occasional brilliance. The research is unambiguous: carbohydrate feeding during the round prevents fatigue, hydration maintains cognitive and physical performance, energy balance supports training adaptations, caffeine and creatine provide measurable ergogenic benefits, and proactive travel nutrition reduces illness and disruption.

    The gap between knowing and doing is where most golfers lose performance. You now know what the research says. The question is whether you’ll implement it. Start with one essential—hydration, carbohydrate feeding, or caffeine—and build from there. Track the results. Adjust based on what works for your body, your schedule, and your performance goals.

    Connecticut golfers have simulator access, TrackMan availability, and year-round training opportunities. Use them. But also use the evidence-based nutrition strategies that research has validated. The combination is what produces consistent improvement, season after season—especially when paired with a structured HH Golf Stick Pressure Plate speed training protocol to maximize your physical gains.

    Sources: O’Donnell A, Murray A, Nguyen A, Salmon T, Taylor S, Morton JP, Close GL. Nutrition and Golf Performance: A Systematic Scoping Review. Sports Medicine. 54:3081–3095, 2024. | Berlin N, Cooke MB, Belski R. Nutritional Considerations for Elite Golf: A Narrative Review. Nutrients. 15(19):4116, 2023.

  • How Caffeine Affects Golf Performance: The Complete Guide

    How Caffeine Affects Golf Performance: The Complete Guide

    Walk into any PGA Tour locker room on tournament morning and you’ll find coffee everywhere. Not because tour players need help waking up—they’ve been awake for hours. They drink coffee because caffeine works. It improves performance in measurable, repeatable ways that translate directly to lower scores. The question isn’t whether caffeine helps golfers. The question is how much to take, when to take it, and whether the tradeoffs are worth it.

    Two recent comprehensive reviews on nutrition and golf—one from Sports Medicine (2024) and another from Nutrients (2023)—synthesized the available research on caffeine and golf performance. Both reviews identified caffeine as one of only two supplements with peer-reviewed evidence supporting its use in golf (the other being creatine monohydrate). The data is compelling: caffeine improves total score, driving distance, putting performance, and subjective energy levels during competitive rounds.

    This article consolidates that research into a practical guide: what caffeine does, how it works, the optimal dosing protocol, and the situations where caffeine may hurt more than it helps.

    What the Research Shows: Caffeine Improves Golf Performance

    The strongest evidence for caffeine and golf comes from a 2016 study by Mumford et al., published in Medicine & Science in Sports & Exercise. The study examined caffeine supplementation during a 36-hole competitive tournament—12 male golfers with handicaps between 3 and 10, double-blind placebo-controlled design, conducted over two consecutive days of competition.

    Participants consumed approximately 1.9 mg/kg caffeine 25 to 35 minutes before starting the round, then a second dose after completing 9 holes. Total caffeine intake per round averaged 3.8 mg/kg body weight. For a 75 kg golfer, that’s roughly 285 mg total—equivalent to about 2.5 to 3 cups of coffee spread across the round.

    The results were statistically significant across multiple performance metrics:

    Performance MetricPlaceboCaffeine (3.8 mg/kg)
    Total Score (strokes)79.4 ± 9.176.9 ± 8.1
    Greens in Regulation6.9 ± 4.68.7 ± 3.4
    Drive Distance (meters)233.3 ± 32.5239.9 ± 33.8
    Self-Reported Energy (mid-round)LowerSignificantly higher (p = 0.025)

    A 2.5-stroke improvement over 18 holes is meaningful. In a professional tournament, that’s often the difference between making the cut and missing it, or finishing top-10 versus top-30. Driving distance increased by approximately 6.6 meters (7.2 yards)—not dramatic, but consistent. Greens in regulation improved by nearly two per round, which is substantial for approach shot accuracy.

    Critically, caffeine did not improve every measured variable. Fairways hit, putts per round, sand shots, and first putt distances showed no significant differences between conditions. This suggests caffeine’s primary benefit is reducing fatigue-related performance decline, not enhancing peak technical execution. The golfers who benefited most were those who reported feeling tired or mentally fatigued during the placebo condition.

    Caffeine and Putting: Evidence from Simulated Golf

    A 2009 study by Stevenson et al., published in Applied Physiology, Nutrition, and Metabolism, tested a carbohydrate-caffeine sports drink in 20 male amateur golfers during a simulated 18-hole round. The drink contained 1.6 mg/kg caffeine plus 0.64 g/kg carbohydrate, consumed as a bolus before play and then at holes 6 and 12.

    Putting performance improved significantly with caffeine-carbohydrate compared with placebo:

    • 2-meter putting success rate (final 6 holes): 70% versus 50% in placebo
    • 5-meter putting success rate (final 6 holes): 40% versus 25% in placebo
    • Total successful putts (18 holes): Significantly higher in caffeine-carbohydrate condition

    The study could not isolate caffeine’s effect from carbohydrate, as both were present in the intervention. However, the improvement was most pronounced in the final six holes—the period when fatigue typically accumulates and blood glucose declines. This supports the hypothesis that caffeine’s primary mechanism in golf is fatigue mitigation, not skill enhancement.

    A related study by Bristow (2016) found no improvement in overall golf performance during an 18-hole round with caffeine at 3 mg/kg, but did observe significant improvements in ball speed and total distance when hitting drives on a golf simulator. This suggests caffeine may enhance explosive power output during maximal efforts, even if the effect doesn’t consistently translate to on-course scoring.

    How Caffeine Works: Mechanisms Relevant to Golf

    Caffeine is an adenosine receptor antagonist. Adenosine is a neurotransmitter that accumulates in the brain during prolonged wakefulness and physical activity, promoting drowsiness and reducing arousal. Caffeine blocks adenosine receptors, preventing this fatigue signal from registering. The result is increased alertness, reduced perception of effort, and enhanced cognitive function.

    Several mechanisms are relevant to golf performance:

    1. Reduced Perceived Exertion

    Caffeine lowers the subjective feeling of effort during physical activity. In golf, this means the walk between shots, the repetitive swinging during practice, and the cumulative fatigue of a 4- to 5-hour round feel less taxing. Mumford et al. reported that golfers in the caffeine condition felt significantly more energetic at the midpoint of the round compared with placebo, even though objective workload was identical.

    2. Enhanced Cognitive Function

    Golf requires sustained attention, rapid decision-making (club selection, shot strategy), and fine motor control (putting). Caffeine improves reaction time, vigilance, and executive function—particularly under conditions of sleep deprivation or mental fatigue. For golfers playing early morning rounds or competing over multiple consecutive days, caffeine helps maintain cognitive sharpness when it would otherwise decline.

    3. Increased Motor Unit Recruitment

    Caffeine enhances neuromuscular activation, allowing for greater force production during explosive movements. This is why Bristow’s simulator study observed increased ball speed and driving distance with caffeine, even though on-course performance was unchanged. The effect is modest—Mumford et al. reported approximately 6.6 meters (7 yards) additional driving distance—but measurable.

    4. Delayed Onset of Mental Fatigue

    Mental fatigue impairs golf performance by reducing focus, increasing decision-making errors, and degrading motor skill execution. Caffeine delays the onset of mental fatigue, which is why the performance benefits in both Mumford’s and Stevenson’s studies were most pronounced in the later holes of the round.

    Supporting Video Resources

    How Caffeine Affects Your Golf Game | Golf Digest

    In this influential experiment, three golfers of varying skill levels hit a series of golf shots while caffeinating between each round to see how caffeine affects their golf game.

    Does Drinking Caffeine Means Better Golf?

    In this video, we dive into the role of caffeine in golf how it might affect your energy, focus, and overall game.

    The Optimal Caffeine Protocol for Golf

    Based on the available research, here is the evidence-based protocol for caffeine use in golf:

    Dose

    3 to 5 mg per kilogram body weight is the effective range. For a 75 kg golfer, this is 225 to 375 mg total. A 90 kg golfer would target 270 to 450 mg. Doses below 3 mg/kg may be subtherapeutic; doses above 6 mg/kg increase side effects (jitteriness, gastrointestinal distress) without additional performance benefit.

    Practical caffeine sources:

    • Coffee (8 oz / 240 mL): 80–100 mg per cup
    • Espresso (1 shot): 60–80 mg
    • Caffeine tablet: 100–200 mg per tablet
    • Energy drink (8 oz): 70–100 mg
    • Pre-workout supplement: 150–300 mg per serving (check label)

    Timing

    Caffeine reaches peak plasma concentration 45 to 60 minutes after ingestion. Consume the first dose 30 to 60 minutes before your tee time. If playing 18 holes or more, consider a second dose at the turn (after hole 9). Mumford’s protocol—split dosing with half the caffeine pre-round and half at the turn—produced the best results in competitive settings.

    Frequency

    Caffeine tolerance develops with chronic use. Habitual caffeine consumers (those who drink coffee daily) require higher doses to achieve the same ergogenic effect compared with caffeine-naïve individuals. However, the literature suggests that even habitual users benefit from strategic caffeine timing around competition. If you drink coffee daily, do not increase your baseline intake dramatically on competition days—this risks gastrointestinal distress and anxiety. Instead, time your usual intake strategically to align with performance windows.

    Delivery Method

    Coffee, caffeine tablets, and energy drinks all work. The key variable is total caffeine dose, not delivery method. However, liquid caffeine (coffee, energy drinks) is absorbed slightly faster than tablets. For Connecticut golfers with sensitive stomachs, caffeine tablets may cause less gastrointestinal distress than coffee, which contains additional compounds (chlorogenic acid, oils) that can irritate the gut.

    Combining with Carbohydrate

    Stevenson’s study used a combined caffeine-carbohydrate drink and observed improved putting performance. The synergy between caffeine and carbohydrate makes physiological sense: caffeine enhances alertness and reduces fatigue perception, while carbohydrate maintains blood glucose and prevents hypoglycemia-related cognitive decline. For golfers, consuming caffeine with a carbohydrate source (sports drink, energy gel, banana) is likely optimal, particularly during longer rounds.

    When Caffeine Hurts Golf Performance

    Caffeine is not universally beneficial. Several scenarios exist where caffeine may impair performance or create unacceptable tradeoffs:

    1. Afternoon or Evening Tee Times

    Caffeine has a half-life of 3 to 5 hours. Consuming caffeine after 2 PM increases the likelihood of sleep disruption that night. Sleep quality is a stronger predictor of next-day performance than caffeine. If you have an afternoon tee time and are playing again the following day, the performance cost of poor sleep likely exceeds the benefit of acute caffeine supplementation. Avoid caffeine after early afternoon if sleep quality matters.

    2. Caffeine-Naïve Players

    Individuals who do not regularly consume caffeine are more sensitive to its side effects: jitteriness, increased heart rate, gastrointestinal distress, and anxiety. These effects can impair fine motor control (putting) and decision-making. If you do not drink coffee regularly, do not experiment with caffeine during competition. Trial it during practice rounds first to assess tolerance.

    3. Pre-Existing Anxiety

    Caffeine increases arousal and can exacerbate anxiety symptoms. Golfers who experience performance anxiety, particularly on the first tee or during pressure situations (putting to win, playing in front of crowds), may find that caffeine worsens anxiety rather than improving focus. If you are prone to nervousness on the course, caffeine may be counterproductive.

    4. Excessive Doses

    Doses above 6 mg/kg body weight increase side effects without additional performance benefit. For a 75 kg golfer, 6 mg/kg is 450 mg—equivalent to roughly 4 to 5 cups of coffee. At this dose, tremor, palpitations, and gastrointestinal distress become likely. The performance-enhancing window is narrow: 3 to 5 mg/kg is optimal. More is not better.

    Caffeine and Multi-Day Tournaments

    Professional and elite amateur golfers often compete over consecutive days. Mumford’s study tested caffeine during a 36-hole tournament (two consecutive days, 18 holes each day) and observed benefits on both days. However, the study did not measure sleep quality or next-day alertness.

    Theoretical concern: if caffeine consumed on Day 1 disrupts sleep, Day 2 performance may be impaired despite acute caffeine supplementation. The research does not provide clear guidance here, but general sleep hygiene principles apply: avoid caffeine within 6 hours of bedtime, prioritize sleep duration and quality, and monitor subjective recovery between rounds.

    For tournaments lasting 3 to 4 days (standard PGA Tour format), caffeine can be used strategically on the final two days when fatigue is highest, while minimizing use on Days 1 and 2 to preserve sleep quality. This is speculative—no golf-specific studies have tested multi-day caffeine protocols—but it aligns with caffeine pharmacology and sleep science.

    Practical Caffeine Protocol: Summary Table

    VariableRecommendationRationale / Evidence
    Dose3–5 mg/kg body weightMumford et al. used 3.8 mg/kg and observed 2.5-stroke improvement
    Timing30–60 min before tee time, second dose at turnPeak plasma concentration at 45–60 min; split dosing maintains levels
    SourceCoffee, tablets, energy drink (any)Total dose matters more than delivery method
    Combine with CHOYes, if round >3 hoursStevenson et al.: caffeine + CHO improved putting vs. placebo
    Avoid if…Afternoon tee time, caffeine-naïve, anxiousSleep disruption and side effects outweigh benefits
    Max dose<6 mg/kg body weightHigher doses increase side effects without added benefit

    Final Word

    Caffeine is not a substitute for skill, practice, or course management. But for golfers who already have those fundamentals in place, caffeine is one of the few legal, safe, evidence-based interventions that measurably improves performance. The effect size—2 to 3 strokes over 18 holes, 6 to 7 yards of additional driving distance, improved putting success rate in the final holes—is modest but real.

    The key is protocol: 3 to 5 mg per kilogram body weight, consumed 30 to 60 minutes before the round, with a potential second dose at the turn. Combine with carbohydrate during longer rounds. Avoid afternoon use if sleep matters. Trial during practice before implementing in competition.

    Most importantly, caffeine’s benefit is not universal. If you’re caffeine-naïve, anxious, or playing in the evening, the tradeoffs may not be worth it. But for the majority of golfers—particularly those competing over long rounds, in hot conditions, or when mentally fatigued—caffeine is a tool worth using. To ensure your physical boost translates into better results, you can pair your routine with precise data by understanding the measurement accuracy of the Blast Motion Golf sensor.

    Sources: Mumford PW, Tribby AC, Poole CN, et al. Effect of Caffeine on Golf Performance and Fatigue during a Competitive Tournament. Medicine & Science in Sports & Exercise. 48(1):132–138, 2016. | Stevenson EJ, Hayes PR, Allison SJ. The effect of a carbohydrate-caffeine sports drink on simulated golf performance. Applied Physiology, Nutrition, and Metabolism. 34(4):681–688, 2009. | O’Donnell A, Murray A, Close GL. Nutrition and Golf Performance: A Systematic Scoping Review. Sports Medicine. 54:3081–3095, 2024.

  • A Golfer’s Guide to Launch Monitor Metrics

    A Golfer’s Guide to Launch Monitor Metrics

    Ask most golfers what determines how far the ball goes and they’ll say the same thing: swing faster. And they’re not wrong — clubhead speed is the single biggest lever you can pull. But if clubhead speed were the whole story, every golfer who swings at 105 mph would carry the ball 280 yards. They don’t. The gap between swing speed and actual carry distance is where most amateur performance is lost, and it’s a gap that a launch monitor can make visible. This winter has been especially cold in Connecticut, so this is a perfect time to head to a place with a Trackman (like Golf Lab CT) before getting ready to face the especially long par 5s at Oxford Greens (like the 630-yard monster on hole #3)

    A 2023 paper published in the Strength and Conditioning Journal by Brennan and colleagues — researchers from Middlesex University, the DP World Tour Performance Institute, Columbia Business School, and the R&A — mapped out a deterministic model of the golf shot, tracing exactly how impact factors at the clubface cascade through to the launch characteristics of the ball and finally to the outcome measures of distance and accuracy. Their framework is the clearest summary of launch monitor science I’ve encountered, and it has practical implications for any golfer using TrackMan or a similar system.

    This article translates that research into actionable guidance: what to measure, what it means, and how to use it to add real carry yards without rebuilding your swing.

    The Outcome That Actually Matters: Strokes Gained

    Before diving into mechanics, it helps to understand what “better” means in quantitative terms. The metric that best captures driving performance is Strokes Gained Off the Tee (SGOTT), a framework developed by Mark Broadie — one of the paper’s co-authors — and now used by the PGA Tour for all tournament statistics.

    Strokes gained measures how many strokes a player gains or loses on a given shot relative to the field, based on where the shot started and where it finished. Broadie’s research found that the long game — tee shots and approach shots — accounts for approximately 72% of the variability in a PGA Tour player’s overall skill. Distance matters: an extra 20 yards off the tee is worth roughly 0.75 strokes per round. That’s a meaningful advantage over a full season.

    But strokes gained requires knowing shot location data typically only available during competition. For training purposes, the launch monitor metrics described below are the proxies that practitioners and golfers can actually work with — the upstream causes that feed into SGOTT.

    The Distance Chain: From Impact to Carry

    Brennan et al. describe shot distance as the product of a chain of causes. Understanding the chain tells you where to intervene. Here are the five variables that matter most.

    1. Ball Speed — The Master Metric

    Ball speed is the velocity of the ball’s center of gravity immediately after it separates from the clubface. It is the most direct predictor of carry distance: research shows that each 1 mph increase in ball speed produces approximately 1.83 yards of additional carry (Betzler et al., 2014). Ball speed is what you should optimize, not clubhead speed in isolation.

    Clubhead speed explains 75% of ball speed variance on its own, but that rises to 82% when impact location is also accounted for (Sweeney et al., 2013). The difference between those two numbers — that extra 7% — is the efficiency gap that most amateur golfers have available to them without changing their swing speed at all.

    2. Impact Location — The Efficiency Variable

    Impact location refers to where on the clubface the ball makes contact, measured in millimeters from the geometric center both vertically and horizontally. Striking off-center triggers the “gear effect” — the clubhead rotates around its center of gravity, altering spin characteristics and reducing ball speed.

    Off-center strikes to the toe produce right-to-left spin (draw spin for a right-hander). Off-center strikes to the heel produce left-to-right spin. Strikes high on the face reduce backspin; strikes low on the face increase it. All of these alter trajectory in ways that reduce carry distance even at identical swing speeds. This is why smash factor — the ratio of ball speed to clubhead speed — is the most actionable consistency metric on TrackMan. A smash factor of 1.50 is the theoretical maximum with driver; most recreational golfers average closer to 1.40–1.44. Closing that gap is free distance.

    3. Spin Rate — The Optimization Variable

    Backspin creates lift by acting perpendicular to the ball’s flight path, counteracting gravity and keeping the ball airborne longer. The problem is that excessive spin also increases drag and causes the ball to balloon, which reduces carry. Spin rate has an optimal range — it is not a case of more being better.

    Wallace et al. found that driver spin rates between 2,280 and 2,640 rpm maximize carry distance for elite players. Brennan et al. note that PGA Tour and LPGA Tour averages sit at approximately 2,685 and 2,682 rpm respectively — slightly above the theoretical optimum, suggesting that even tour players carry marginal spin inefficiency. For recreational players, spin rates of 3,200–3,800 rpm are common, which can represent a carry loss of 15–25 yards compared with an optimized spin profile at identical swing speeds. Spin rate is influenced by clubhead speed, vertical impact location, angle of attack, and dynamic loft — all of which are measurable.

    4. Launch Angle — The Trajectory Variable

    Launch angle is the vertical angle of the ball’s initial flight relative to the ground. Too low and the ball doesn’t stay airborne long enough to maximize carry. Too high and it balloons, generating excessive spin and losing distance. The research-supported optimal range for driver is 10–14 degrees for elite golfers, though some studies suggest up to 20 degrees can maximize carry distance under specific conditions.

    TrackMan University data provides a useful calibration point: a golfer swinging at 95 mph with a +4-degree attack angle (hitting up on the ball) should target a launch angle of 15.6 degrees and a spin rate of 2,404 rpm to maximize distance. The same 95 mph swing with a -4-degree attack angle (hitting down) should target 11.4 degrees launch and 3,150 rpm. Attack angle affects both launch angle and spin simultaneously, which is why sweeping the driver off the tee — with a slightly positive attack angle — tends to optimize both variables at once. Launch angle is strongly correlated with dynamic loft (r = 0.74).

    5. Dynamic Loft — The Loft You Actually Deliver

    Dynamic loft is the vertical orientation of the clubface at the moment of maximum compression — the effective loft delivered to the ball, which is often quite different from the club’s stated loft. Dynamic loft is the primary driver of launch angle (b = 0.58) and contributes meaningfully to spin rate. If dynamic loft is too high, backspin increases and distance suffers. If too low, the ball launches too flat.

    Increasing your attack angle with driver — hitting slightly up on the ball — reduces dynamic loft relative to the club’s physical loft, which is why it typically produces both lower spin and higher launch. The combination of positive attack angle and appropriately matched dynamic loft is the driver fitting formula that launch monitors were designed to optimize.

    Launch Monitor Reference: Key Distance Metrics

    This table summarizes the five core distance metrics, their optimal ranges for driver, and what to do if your numbers are outside those ranges.

    MetricOptimal Range (Driver)If Too LowIf Too High
    Ball Speed150–175+ mph (varies by CHS)Improve center contact; raise CHSN/A — maximize this metric
    Smash Factor1.48–1.50 with driverFocus on strike quality; find sweet spotTheoretical max is 1.50; maintain it
    Spin Rate2,280–2,640 rpm (elite)Check impact location & dynamic loftPositive attack angle; less dynamic loft
    Launch Angle10–14° (up to 20° in some models)Increase attack angle; raise dynamic loftReduce dynamic loft; check tee height
    Attack Angle+2° to +5° with driverTee ball slightly higher; widen stanceBall position adjustment; check setup

    Shot Dispersion: Why You Miss Offline

    Distance and accuracy are not independent variables — they share several upstream causes. Brennan et al. dedicate equal attention to shot dispersion, which is the lateral accuracy of the shot measured as how far offline the ball finishes relative to the intended target.

    Two launch characteristics govern dispersion: spin axis and launch direction. Both are primarily controlled by face angle at impact — the single most powerful accuracy variable in the golf swing.

    Spin Axis and the D-Plane

    The spin axis is the tilt angle of the ball’s rotational axis immediately after impact. When the spin axis is tilted, the ball curves. TrackMan reports that for every 5 degrees of spin axis tilt, the ball will deviate 3.5 yards per 100 yards of ball flight — meaning a 280-yard drive with a 10-degree spin axis tilt finishes approximately 20 yards offline.

    Face angle at impact explains 82% of spin axis variance (Miura, 2002). Club path influences spin axis as well but to a lesser degree. The relationship is described by the D-Plane theory: the ball’s initial direction is primarily determined by face angle, and the curve is determined by the relationship between face angle and club path. A face angle pointed right of path produces left-to-right spin (fade/slice); left of path produces right-to-left spin (draw/hook).

    Face Angle and Launch Direction

    Launch direction — the horizontal angle at which the ball departs the clubface — is explained by face angle up to 61–83% of the time (Wood et al., 2018). The practical implication is significant: Sweeney et al. found that a 2-degree error in launch direction with driver produces approximately 10 meters of offline distance at 280 meters of carry. The same 2-degree error with a 120-meter wedge produces only 4 meters of offline deviation.

    This explains why driver accuracy is so disproportionately affected by small face angle errors compared with shorter clubs. The amplification of face angle errors with driver is one reason why many golfers should prioritize face control work before obsessing over swing path.

    A Practical TrackMan Monitoring Protocol

    Brennan et al. emphasize that monitoring variability in these metrics — not just peak values — is essential for practitioners and golfers using launch monitors. They recommend establishing baseline scores for key metrics, then using the coefficient of variation (CV) to set targets for meaningful improvement. Here is how to apply that framework in a practical TrackMan session.

    Session Structure by Week

    WeekTrackMan Session FocusShots
    1Baseline only. 20 drivers at normal intent. Record mean and SD for ball speed, smash factor, spin rate, launch angle. No swing changes.20
    2Identify primary fault. If smash factor < 1.44: impact location work. If spin > 3,000 rpm: attack angle and tee height drills. If launch < 10°: dynamic loft assessment.20
    3Targeted intervention. Use feedback from Week 2 to address single variable. Hit 15 balls per session tracking only the target metric.15
    4Validation session. Repeat Week 1 protocol exactly. Compare mean and SD across all metrics against baseline. Look for co-improvement in related metrics.20
    5–6Integration. Hit shots without deliberate mechanical focus. Allow adaptations to consolidate. Monitor carry distance and dispersion as outcome measures.20–25

    Key Metrics to Track — What Improvement Looks Like

    • Ball Speed SD: Target variability of ±5 mph or less across a 20-ball session. Wild swings indicate inconsistent strike or tempo.
    • Smash Factor: Each 0.01 improvement in average smash factor is worth approximately 1.5 mph of ball speed without changing swing speed. Target 1.47+ as an intermediate golfer.
    • Spin Rate: For most recreational players, reducing spin from 3,200 to 2,700 rpm (through attack angle and tee height adjustment) can add 12–18 yards of carry at identical swing speeds.
    • Launch Angle: Should be within 1–2 degrees of your optimal value across a session. Large variance in launch angle indicates inconsistent dynamic loft delivery.
    • Carry Distance SD: This is the final proof. Brennan et al. suggest using the CV to set targets — a CV of 5% on driving distance means your carry must improve by more than 5% before the change exceeds measurement noise.

    A Note on Skill Level and Metric Usability

    Brennan et al. make an important practical point that often gets overlooked: the usability of some metrics depends on a golfer’s skill level. A professional golfer can produce reasonably consistent clubhead speed and distance on demand. A 18-handicapper may show consistent clubhead speed but far more variable carry distance — because the ability to transfer speed consistently into ball speed requires a level of strike quality that develops over time.

    This means that recreational golfers should probably focus first on smash factor and spin rate consistency before chasing raw ball speed gains. A 95 mph swing hitting 1.47 smash factor will outcarry a 100 mph swing hitting 1.39 smash factor every time. Get the efficiency right first; the speed gains will layer on top.

    Final Word

    TrackMan and comparable launch monitors are now available at most Connecticut simulators and indoor facilities, typically included in the hourly bay rate. The information they provide is only useful if you know what to look for. Brennan et al.’s deterministic model gives you the map: ball speed drives carry distance, and ball speed is determined by clubhead speed multiplied by strike efficiency. Spin rate needs to be optimized, not maximized. Launch angle needs to match your attack angle and dynamic loft. Face angle governs dispersion.

    None of this requires a swing overhaul. Impact location, attack angle, and tee height are all adjustable without mechanical reconstruction. A single focused TrackMan session — baseline numbers, identify the primary fault, set a target — is more likely to improve your driving distance than another bucket of balls hit without feedback.

    Clubhead speed matters. But as Brennan and colleagues make clear, it’s only the beginning of the chain. The golfers who close the gap between potential distance and actual distance are the ones who understand the links between impact and carry — and work on them methodically.

    Source: Brennan A, Ehlert A, Wells J, Broadie M, Coughlan D, Turner A, Bishop C. Monitoring Performance in Golf: More Than Just Clubhead Speed. Strength and Conditioning Journal. 45(6):631–641, December 2023.

  • How to Use the Tour Tempo App to Optimize Your Driver

    How to Use the Tour Tempo App to Optimize Your Driver

    I spent two years chasing distance before I realized my real problem was consistency. My TrackMan numbers told the story: swing speed varied by 8 mph shot to shot, launch angle fluctuated wildly, and my dispersion pattern looked like a shotgun blast. The issue wasn’t my swing mechanics—it was that I had no swing mechanics. Every rep was a different tempo, a different rhythm, a different timing sequence. The Tour Tempo app helped to improve that. I first heard about this app from the Wicked Smart Golf podcast, and have really liked it after buying it. Based on research by John Novosel analyzing thousands of tour player swings, the app trains you to match proven tempo ratios—specifically the 3:1 ratio used by most tour pros with driver. Three frames from takeaway to top of backswing, one frame from top to impact. The app uses audio tones to mark these positions, giving you an external metronome to lock in repeatable timing.

    After six weeks of training with Tour Tempo while tracking progress on TrackMan, my driver dispersion dropped from an average of 42 yards offline to 25 yards. Swing speed consistency tightened from ±8 mph to ±2 mph. Smash factor climbed from 1.42 to 1.48. Most importantly, my misses became predictable. This is the protocol I built and how to implement it yourself.

    Understanding Tour Tempo Ratios

    Tour Tempo is built on frame-count analysis of professional swings filmed at 30 frames per second. The research found that tour players cluster around specific timing ratios regardless of their overall swing speed. For driver, the dominant ratio is 3:1—meaning the backswing takes three times as long as the downswing. In absolute time, this typically translates to 27 frames total: 21 frames from start to top, 6 frames from top to impact. At 30 fps, that’s 0.70 seconds backswing, 0.20 seconds downswing, 0.90 seconds total. The app offers multiple tempo options—24/8 (faster, more aggressive), 27/9 (tour standard), and 30/10 (slower, more controlled). Each maintains the 3:1 ratio. There’s also a 2:1 ratio option (18/9) used by some players with irons, but for driver work, I recommend starting with 27/9. It matches the statistical mode of tour swings and provides enough backswing time to load properly without rushing the transition.

    The great thing of the system is that it doesn’t care about your swing mechanics. You can swing flat or upright, one-plane or two-plane, strong grip or weak grip—the tempo ratio works regardless. What it fixes is the timing variable that most amateurs never address. We spend hours on swing path and face angle and ignore the fact that our swing takes a different amount of time every single rep.

    The 6-Week Tour Tempo and TrackMan Protocol

    This protocol layers tempo training into your existing practice while using TrackMan to validate improvements in consistency. Weeks 1-2 focus on ingraining the audio tones without a ball. Weeks 3-4 introduce ball striking with tempo focus. Weeks 5-6 integrate tempo into full TrackMan sessions and dial in your optimal frame count. Each session takes 20-30 minutes. Four sessions per week is ideal, but three will work.

    The key is separating tempo acquisition from ball striking initially. If you try to match the tones while worrying about contact quality, you’ll subconsciously adjust your tempo to “save” bad swings. Build the timing pattern first in a zero-pressure environment, then layer in the ball.

    Tour Tempo Training Protocol by Week

    WeekTraining FocusReps
    1No ball. Practice swings only with 27/9 tones. Focus on hearing all three beeps (start, top, impact). Use alignment stick or club.30-40
    2Continue no-ball work. Add ‘eyes closed’ drill for 10 reps. Establish baseline TrackMan session (20 drivers, no tempo focus).30-40
    3Introduce ball. 5 tempo-only swings (no ball), then 10 balls with tones. Accept mishits. Track on TrackMan.15
    4Full TrackMan session with tones. 20 drivers. Compare dispersion and consistency metrics to Week 2 baseline.20
    5Test alternate tempos: try 24/8 (faster) and 30/10 (slower). Hit 8 balls each. Compare TrackMan metrics.24
    6Lock in optimal tempo. Full 25-ball TrackMan session with your best-performing tempo. Wean off tones for final 5 swings.25

    How to Use the Audio Tones During Practice

    The Tour Tempo app plays three tones per swing. Tone 1 marks your takeaway start. Tone 2 marks top of backswing. Tone 3 marks impact. For the 27/9 setting, you’ll hear a rhythm that sounds roughly like: beep… beep… BEEP. The first two tones are spaced further apart (the backswing), the final tone comes quickly after the second (the downswing). Start each rep by pressing play, then beginning your swing on the first tone. Don’t try to match the tones consciously—just let them play and swing naturally while listening. After 10-15 reps, your nervous system will start syncing to the rhythm automatically. You’ll feel yourself ‘waiting’ for the second tone at the top and releasing on cue when the third tone fires.

    The most common mistake is trying to force the match. If you consciously slow down or speed up to hit the tones, you’ll create mechanical compensation patterns. Instead, swing freely and notice where your natural timing falls relative to the tones. Early in Week 1, you might be consistently late to the top (hitting your actual top position after tone 2) or rushing the downswing (impacting before tone 3). That’s fine. The feedback loop is what trains the adjustment.

    TrackMan Metrics to Track for Tempo Optimization

    Tempo training isn’t about hitting it farther—it’s about hitting it the same. The TrackMan metrics that matter most are consistency and predictability, not peak performance. Here’s what to monitor:

    • Swing Speed Standard Deviation: Your goal is ±2 mph or less across a 20-ball session. Pre-tempo, mine was ±8 mph. Post-tempo: ±1.8 mph.
    • Lateral Dispersion (offline distance): Measure how far left or right your shots finish from centerline. Pre-tempo average: 42 yards. Post-tempo: 25 yards.
    • Launch Angle Consistency: Should stay within ±2 degrees. Wild variance indicates inconsistent delivery. Mine tightened from ±4.5° to ±1.8°.
    • Smash Factor: This will improve as strike quality becomes more consistent. Target 1.48+ with driver. Mine improved from 1.42 to 1.48 average.
    • Spin Rate Variance: Should cluster within ±300 RPM. Tempo fixes delivery path, which stabilizes dynamic loft and attack angle.

    In Week 2, establish your baseline by hitting 20 drivers without the app—just your natural swing. Record all five metrics. Then in Week 4 and Week 6, repeat the 20-ball session with tempo tones active and compare. The improvement in standard deviation and dispersion is where tempo makes its case.

    Supporting Video Resources

    Master the 3:1 Ratio: Gain Speed and Consistency with Tour Tempo

    Stop overthinking your mechanics and start swinging with the rhythm of a tour pro!

    The Simple Secret to Carrying Your Driver 300+ Yards

    Learn how to optimize your impact to maximize every ounce of power in your swing

    Common Tempo Mistakes and How to Fix Them

    Mistake 1: Starting the app mid-swing

    The tones only work if you start moving on tone 1. If you press play and then wait to swing, you’ll be chasing the rhythm instead of syncing to it. Press play, hear tone 1, start your takeaway. The timing should feel like: tone = move, not move = tone.

    Mistake 2: Forcing mechanical changes to match the tones

    Don’t artificially slow your backswing or rush your downswing. Swing naturally and let the mismatch reveal itself. Your body will adjust over reps. If you consciously manipulate tempo, you’ll build compensation patterns that fall apart under pressure.

    Mistake 3: Jumping straight to ball striking

    Week 1 exists for a reason. If you skip the no-ball reps, you’ll be managing two learning curves simultaneously—tempo matching and strike quality. Separate them. Build the tempo pattern in a zero-consequence environment first.

    Mistake 4: Sticking with one tempo without testing alternatives

    The 27/9 setting is the statistical mode, but it’s not universal. Some players naturally swing faster or slower. Week 5 is designed to test this. Hit balls with 24/8 and 30/10 and see which produces better TrackMan consistency. The right tempo is the one where your metrics tighten, not the one that “feels” right.

    Final Word

    The Tour Tempo app costs $24.99. A single TrackMan session at most facilities in Connecticut runs $40-60 (or free if you have a membership at Golf Lab CT). Total investment for this protocol: under $300 if you’re paying for range time and TrackMan access. The ROI isn’t measured in yards gained—it’s measured in fairways hit, greens in regulation, and strokes saved from eliminating the catastrophic miss.

    Tempo is the invisible variable in the golf swing. You can’t see it on video. It doesn’t show up in a mirror. But it governs everything—transition timing, sequencing, strike quality, consistency. The Tour Tempo app makes the invisible visible by giving you an external reference point. The TrackMan validates that the timing improvements are transferring to ball flight.

    I’ve used this protocol twice now—once in the fall and once during an off-season reset. Both times, the dispersion numbers improved by 35-40%. Both times, the consistency metrics tightened significantly. And both times, the gains carried into actual rounds. If you’ve ever felt like your swing is different every day, like you don’t know which version of yourself is showing up on the first tee, tempo training is the answer. It won’t make you longer. But it will make you the same. And in golf, being the same is often better than being great.

  • HH Golf Stick and Pressure Plate Build Real Swing Speed

    HH Golf Stick and Pressure Plate Build Real Swing Speed

    There’s a gap between knowing you need more swing speed and actually building it in a way that transfers to the course. I spent most of last year chasing that gap. I’d bought the HH Golf Swing Speed Trainer after getting tired of watching $250+ speed sticks do essentially the same thing—overspeed loading across three weight configurations. The HH stick delivered. Within a few weeks, I’d gone from 81 mph to 85 mph on TrackMan, and that alone was worth the $30.

    But speed without ground force is just flailing. I noticed that while my peak velocities were climbing, my ball speed wasn’t keeping pace. Strike quality was inconsistent. I was swinging faster but not transferring that energy into the ball efficiently. That’s where the pressure plate changed everything.

    By pairing the HH Golf stick with a pressure plate—I use the WhyGolf model, though any rocker-style plate works—I was able to simultaneously train neuromuscular speed and the weight shift mechanics that allow you to actually use that speed at impact. The combination is, in my experience, the single best off-season training stack a Connecticut golfer can own. Here’s the protocol I built and how to implement it yourself.

    Why This Works

    The HH Golf stick trains your nervous system to fire faster through overspeed principles. You swing a lighter implement to override your body’s natural governor on rotational velocity. Then you swing a heavier one to build strength at the new speed threshold. Published data from independent testing shows average gains of 4.7 mph over eight weeks with three sessions per week. The problem is that speed training in isolation tends to create disconnected movement patterns. Golfers develop faster hands and torso rotation, but their lower body doesn’t adapt in sync. The pressure plate solves this by providing instant tactile feedback on whether your weight is shifting forward at the right time. Think of it this way: the speed stick builds the engine, and the pressure plate teaches you how to put it in gear.

    The 8-Week Speed and Pressure Protocol

    I structured this as a progressive protocol that layers the pressure plate into your existing speed work. Weeks 1–2 focus on pure overspeed adaptation. Weeks 3–4 introduce pressure plate awareness. Weeks 5–8 integrate both tools simultaneously and push toward peak speed with optimized ground force timing. Each session takes 15–20 minutes. Three sessions per week is the minimum effective dose.

    The progression from isolated speed work to integrated pressure-plate swings is intentional. If you introduce the plate too early, you’ll subconsciously throttle your speed to “get the timing right.” Build the speed ceiling first, then teach your body to use it with proper ground mechanics.

    HH Stick Protocol by Week

    WeekHH Stick WorkSwings
    1–2Light weight only. 3 sets of 5 dominant-side swings. Max intent, maintain balance.15
    3–4Light → Medium → Heavy sequence. 2 sets of 3 per weight. Add 5 non-dominant hand swings.18
    5–6Full spectrum: L → M → H → M → L. 3 sets of 3. Add “freezer at top” drill on heavy.21
    7–8Full spectrum, 4 passes. Add lead heel lift drill. Max intent every swing.24 + 10

    Pressure Plate Integration by Week

    WeekPressure Plate WorkRest
    1–2None. Establish baseline speed numbers on TrackMan.90 sec
    3–4Separate session: 20 half-speed 7-iron swings on plate. Focus on hearing the tip at transition.60 sec
    5–6Stand on plate during light-weight stick swings. Confirm plate tips at transition every rep.45 sec
    7–8Full integration: all stick swings on plate. Alternate sets between stick and driver.60 sec

    Supporting Video Resources

    SuperSpeed Golf Swing Speed — Level 1 Training Protocol

    SuperSpeed Golf’s Level 1 protocol walkthrough — the same light-medium-heavy sequencing used in this HH Golf Stick program.

    Athletic Motion Golf — How to Use the Ground to Generate SPEED in Your Golf Swing

    Athletic Motion Golf breaks down how tour pros use ground force versus amateurs — the exact mechanic the pressure plate trains during this protocol.

    Pressure Plate Setup and Mechanics

    Place the WhyGolf Pressure Plate under your lead foot (left foot for right-handed golfers), arrows pointing toward the target. Position it so the pivot point sits roughly under the ball of your foot—not your heel, not your toes. This ensures the tipping action corresponds to genuine forward pressure shift, not just ankle roll. During your backswing, the plate should remain neutral or tip slightly back. At transition—the split second where your lower body starts firing toward the target while the club is still going back—the plate should audibly and physically tip forward.

    I recorded my sessions on video and synced the footage with TrackMan data. On swings where the plate tipped early in transition, my ball speed jumped by 3–5 mph compared to swings where the tip was late—even though swing speed was nearly identical. That’s the efficiency the pressure plate trains.

    Combining with Real Club Work and Validating Transfer

    Starting in Week 5, I began hitting actual balls while standing on the pressure plate. This is where you validate that the speed gains from the HH stick are transferring. Start with 5 swings using the light-weight HH stick on the plate with no ball—pure activation swings to wake up the nervous system and confirm the plate tips at transition. Then switch to your driver or 7-iron and hit 10 balls in TrackMan’s Shot Analysis mode. Watch three numbers: swing speed, ball speed, and smash factor. If your smash factor is above 1.45 with the driver, your ground force timing is working. If it’s below 1.40, your speed gains haven’t integrated yet—go back to the plate-only drills.

    Over the full 8-week protocol, swing speed gains of 3–6 mph are typical. I gained 4 mph on the stick and saw roughly 3.5 mph carry over to my actual driver. The pressure plate work improved my smash factor from 1.41 to 1.47, which translated to an additional 8–10 yards of carry even before the speed gains are factored in. Combined, I picked up about 15 yards of driver carry.

    The less quantifiable benefit is tempo consistency. Speed training can make your swing feel jerky and rushed if you’re not anchoring it with proper sequencing. The pressure plate prevents this by giving your body a physical checkpoint every single rep. After Week 6, my transition felt noticeably smoother, and my miss pattern tightened.

    Key Metrics to Track Throughout the Protocol

    • Swing speed (TrackMan or app): expect +3–6 mph over 8 weeks
    • Ball speed: should rise proportionally; if it lags, ground force timing is off
    • Smash factor: target 1.45+ with driver; the pressure plate’s primary contribution
    • Carry distance: the final proof — expect +12–18 yards combined
    • Plate tip timing: should occur at transition, not early backswing or late downswing

    Final Word

    The HH Golf Swing Speed Trainer runs about $30–$35 on Amazon. The WhyGolf Pressure Plate is $99. Total investment: roughly $130. For comparison, a SuperSpeed system alone is $199–$299, and a force plate system like BodiTrak or Swing Catalyst runs $1,000+. If you already have simulator access, this is the highest-ROI training aid combination I’ve found.

    Speed training without ground force awareness is incomplete. The HH Golf Stick will make you faster, and the numbers will prove it. But if you’re not simultaneously teaching your body where to put that speed—into the ball through proper weight shift and sequencing—you’ll leave yards on the table. The pressure plate closes that loop. It turns a $30 speed stick into a legitimate performance system.

    I’ve run through this protocol twice now, once in late fall and once over the winter. Both times, the gains carried into my first rounds of the spring season. That’s the test that matters—not whether you can swing a weighted stick 5 mph faster in a simulator bay, but whether you can hit it 15 yards past your old mark on Hole 1 when it counts. For me, the answer has been yes. I suspect it will be for you too.